
Libation Bowl vs Chaos Altar: OSRS Prayer Training for Risk-Averse Mains
27 September 2026 · 14 min readCompare safe Varlamore libation bowl prayer training with risky Wilderness chaos altar methods. Learn XP rates, GP/XP differences, trip planning, and risk-averse training schedules.
Game screenshots and facts are cited from the Old School RuneScape Wiki (strategy, equipment, drops, and related pages). Writing is original editorial, not a copy of the wiki article.
Contents
- Methods at a Glance
- Requirements and Setup for Both Methods
- Libation Bowl Mechanics at the Teomat
- Chaos Altar Mechanics in the Wilderness
- Experience Rates and Attention Required
- Cost per XP: Comparing GP Efficiency
- Risk Profile: Safe Varlamore vs Multi-Combat Wilderness
- Inventory and Trip Planning for Each Method
- Common Mistakes and How to Avoid Them
- Practical Next Steps: Training Schedules and Buying Shortcuts
Old School RuneScape players often reach a fork in Prayer training: stay in safe Varlamore with the libation bowl or gamble on the Wilderness chaos altar. Both methods are miles ahead of burying bones, but they appeal to different temperaments. This guide breaks down mechanics, XP rates, GP/XP tradeoffs, and trip strategies so you can choose the method that suits your risk tolerance and bank value.


If you're a main with limited playtime and hate losing supplies to PKers, the libation bowl may be your long-term answer. If you can handle occasional deaths and want the lowest bone cost, the chaos altar is hard to beat. We'll compare them from a risk-averse perspective and show when buying gold can shortcut the supply grind.
Methods at a Glance
Before the deep dive, here is how the two training styles stack up. Both require some upfront preparation, but the day-to-day loop is very different.
| Method | Attention Needed | Risk Level | Cost Model | Typical XP/hr (wiki estimates) | Key Requirement |
|---|---|---|---|---|---|
| Libation bowl (blessed wine) | Low-moderate; auto-sacrifice, occasional prayer recharge | Safe (Varlamore) | Blessed bone shards + jugs of blessed wine | ~670k–1.11m depending Prayer level | 30 Prayer, access to Teomat, shards |
| Libation bowl (blessed sunfire wine) | Low-moderate; same loop but higher supply prep | Safe | Shards + sunfire splinters + jugs of wine | ~809k–1.42m depending Prayer level | 30 Prayer, sunfire splinters, pestle and mortar |
| Chaos altar (Wilderness) | High; manual offering, PKer awareness, prayer management | High (multi-combat Wilderness) | Bones only; 50% chance to save each bone | Varies widely; high-level bones can exceed 1m XP/hr | Members, Wilderness access, bones |
Experience rates are estimates from the OSRS Wiki and depend on your efficiency, Prayer level, and bone/shard prices. Always verify current GP/XP before committing.
Requirements and Setup for Both Methods
You don't need maxed stats to use either method, but a few unlocks will make your life much easier.
- Libation bowl: Level 30 Prayer, access to Varlamore, and a supply of blessed bone shards and either blessed wine or blessed sunfire wine. You'll also need a chisel to break down bones into shards.
- Chaos altar: Members status, no Prayer level requirement but 43 Prayer is highly recommended for Protect from Melee/Magic, and a method to reach the Wilderness (burning amulet, obelisk, or Ancient Magicks).
- Both: Zealot's robes are optional but powerful. The full set gives a 5% chance to save bones/shards, stacking multiplicatively at the chaos altar and rolling per shard at the libation bowl. Obtaining them requires cremating urium remains, which is slow but profitable on average.
For libation bowl training, complete quests like The Restless Ghost, Priest in Peril, Recruitment Drive, and Holy Grail to jump from level 1 to 30 Prayer without spending any gold on bones. From there, the Teomat becomes your base.
Libation Bowl Mechanics at the Teomat
The libation bowl sits in the northern building of the Teomat in Varlamore. After filling it with blessed wine, you sacrifice blessed bone shards for 5 Prayer XP per shard with regular blessed wine, or 6 XP per shard with blessed sunfire wine. Each offering drains 2 Prayer points, and you can sacrifice up to 100 shards per action for a burst of 500 or 600 XP.

Sacrificing happens automatically while you have shards, wine charges, and Prayer points, but you can speed it up dramatically by spam-clicking the bowl. One jug of blessed wine provides 400 shard charges, so a full inventory of 27 jugs can process up to 10,800 shards. That's 64,800 XP with sunfire wine before you need to bank – assuming you have enough Prayer points to last; recharging at the nearby Shrine of Ralos takes about 25 seconds per trip.
The main prep occurs before you reach the bowl. You must break down bones into blessed bone shards at the exposed altar, using a chisel. Noted bones can be exchanged at Virilis for 10 coins each, then blessed and broken down. This step is slow but can be done in bulk, and it's where many players spend most of their time.
Chaos Altar Mechanics in the Wilderness
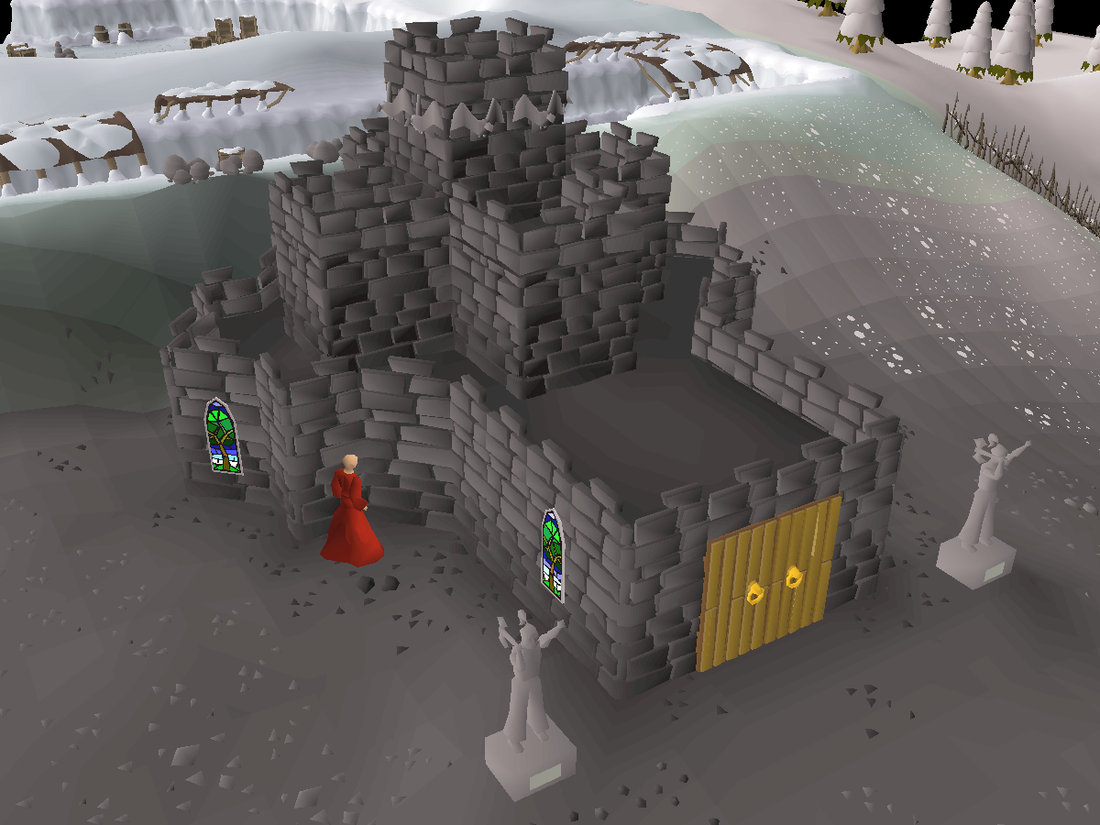
The chaos altar inside the Chaos Temple offers a different kind of efficiency. When you use a bone on the altar, you receive 3.5x the normal burying XP, identical to a gilded altar with two burners lit. However, every bone has a 50% chance to not be consumed. That chance can chain: a single bone might be offered multiple times before disappearing. The result is an average of 7x normal burying XP per bone – double a gilded altar's rate.

Wearing the full Zealot's robes adds another roll on top of the altar's save chance, giving an effective 52.5% chance to save each bone. That pushes the average to 7.37x normal burying XP. Because bones are the only supply, the chaos altar often has the lowest GP/XP among high-intensity Prayer methods – if you ignore the losses from player killers.
There is also an Elder Chaos druid nearby who can unnote bones for 50 coins each, enabling long trips without leaving the temple. However, carrying noted bones increases your potential loss on death.
Experience Rates and Attention Required
The libation bowl's XP/hr scales with your Prayer level because it determines how many recharge trips you need. The OSRS Wiki provides these estimates when using existing shards and recharging at the Shrine of Ralos:

- Level 30–32: ~670k XP/hr (blessed wine) / ~809k XP/hr (sunfire wine)
- Level 48–60: ~923k XP/hr (blessed wine) / ~1.1m XP/hr (sunfire wine)
- Level 88–99: ~1.11m XP/hr (blessed wine) / ~1.32–1.42m XP/hr (sunfire wine)
With prayer potions and pre-prepared sunfire wine, the wiki suggests up to 1,656,000 XP/hr is possible in optimal conditions. Attention is low: the bowl sacrifices automatically, though clicking faster improves rates. Chaos altar rates depend heavily on bone type and how efficiently you avoid PKers. Using high-level bones like superior dragon bones with a safe suicide method can exceed 1m XP/hr, but the constant wilderness threat adds stress and occasional downtime. For a risk-averse main, the libation bowl's predictable, safe rates may be worth a slight XP/hr sacrifice.
Cost per XP: Comparing GP Efficiency
Prayer training costs are ultimately a function of supply prices, which change daily. We won't quote specific gp numbers, but you can reason through the relative efficiency.
- Libation bowl: You buy or create blessed bone shards and blessed wine. Each shard gives a fixed 5 or 6 XP. The number of shards per bone depends on the bone type, and you also pay 10 coins per bone to unnote at Virilis. Sunfire wine adds the cost of sunfire splinters and jugs of wine. Because the XP per shard is fixed, the GP/XP is easy to calculate once you know shard output per bone.
- Chaos altar: You buy bones directly. The 50% save chance effectively halves your bone consumption compared to a gilded altar, so your cost per XP is roughly half of gilded altar rates. With Zealot's robes, it drops another ~5%. There are no extra consumables, but you risk losing bones on death, which can erase the savings if you die often.
As a general rule, if you plan to train to 77, 85, or 99 Prayer, the chaos altar's bone savings can translate to tens of millions of gp saved over a gilded altar. The libation bowl's cost per XP sits somewhere between gilded altar and chaos altar, depending on how cheaply you source sunfire splinters and whether you make your own shards. Many mains choose the libation bowl not because it's the absolute cheapest, but because it's safe and still far better than gilded altar for risk-free training.
Risk Profile: Safe Varlamore vs Multi-Combat Wilderness
This is the heart of the decision for risk-averse players.
- Libation bowl: Located in Varlamore, outside the Wilderness. No PKers, no multi-combat danger. The only risk is making a mistake like running out of prayer points mid-trip or misclicking your chisel, which wastes time but not gp.
- Chaos altar: In level 38 Wilderness, multi-combat. PKers frequently camp the temple and surrounding area. You can lose your entire inventory of bones plus any gear you brought. Even with careful play, deaths happen. If you hate that stress, the libation bowl is the clear winner.
Risk mitigation for chaos altar exists, but it adds complexity. The suicide method involves bringing a full inventory, offering bones, then dying quickly (to wine of Zamorak or the Chaos Fanatic) to respawn at a nearby bank. The logout method requires keeping the logout menu open and hovering over the button, logging instantly if a white dot appears. Both strategies reduce losses but cannot eliminate all risk, and they slow down trips.
Inventory and Trip Planning for Each Method
Efficient trips start with the right inventory.

Libation bowl trip plan
- Bring noted bones, a chisel, and coins to Virilis at the Teomat. Unnote bones for 10 gp each.
- Bless the bones at the exposed altar, then break them into blessed bone shards with the chisel. Spam clicking speeds this up.
- Bank the shards and withdraw a full inventory of blessed wine (or blessed sunfire wine) plus the shards.
- Use the wine on the libation bowl to fill it, then sacrifice shards. Recharge prayer at the Shrine of Ralos when needed.
- Return via pendant of Ates or perfected quetzal whistle for quick banking.
Chaos altar trip plan
- Decide on risk level: unnote bones at Elder Chaos druid (50 gp each) or bring small unnoted inventories with a suicide strategy.
- Teleport to Lava Maze with a burning amulet, or use a player-owned house obelisk if Hard Wilderness Diary is complete.
- Run southwest to the temple, offer bones on the altar. Keep Protect from Magic up if you have prayer to spare.
- For suicide method: lower HP, die to wine or Chaos Fanatic, respawn at Ferox Enclave or Edgeville, bank, repeat.
- For logout method: keep the logout button visible, hover, and log out the moment you see a PKer.
Both methods benefit from graceful or stamina potions for running, but the libation bowl loop is much shorter and can be made nearly zero-stamina with the quetzal whistle network.
Common Mistakes and How to Avoid Them
- Running out of prayer at the libation bowl. Each shard costs 2 Prayer points. If you don't recharge or drink potions, the bowl stops. Plan your recharge trips or bring prayer potions at higher levels.
- Not bringing a chisel or coins to Virilis. You'll waste a trip. Keep a chisel in your inventory and enough coins for un-noting.
- Assuming Zealot's robes save wine charges. At the libation bowl, Zealot's robes can save individual shards, but they do not save the bowl's charges. Do not expect fewer wine jugs needed.
- At chaos altar, bringing too much risk. Noted bones are convenient but if you die, you lose the stack. Use the suicide method with minimal gear and always unnote only what you can offer quickly.
- Ignoring the logout hover. The most common cause of chaos altar deaths is slow reaction. Keep the logout menu open and your cursor ready.
- Forgetting to use protection prayers. At chaos altar, you can recharge prayer at the altar, so keeping Protect from Magic up reduces damage from PKers and gives you time to log out.
Practical Next Steps: Training Schedules and Buying Shortcuts
If you're risk-averse, start with quests to hit 30 Prayer, then move to the libation bowl. Use blessed wine for lower upfront cost, and switch to blessed sunfire wine once you can afford the splinters. Target milestones: 43 for protection prayers, 70 for piety, 77 for augury/rigour, and 85 for achievement diaries. The libation bowl's safe rates can carry you all the way to 99 if you have the bankroll, without ever stepping into the Wilderness.
If you're willing to accept some risk for faster and cheaper training, try a short chaos altar session with low-value bones first. Master the suicide method on a PvP world, then scale up to superior dragon bones. Even 30 minutes at the chaos altar will teach you whether the PKer pressure is tolerable.
For another method-vs-method cost breakdown, check out our Abyssal Bludgeon vs Blast Furnace Pump guide. The same decision framework applies: time, cost, and risk.
Sources:
Is libation bowl better than chaos altar for prayer training?
It depends on risk tolerance. Libation bowl is safe and predictable, with XP rates up to ~1.4m/hr with sunfire wine. Chaos altar can be cheaper per XP due to 50% bone saving but carries PK risk. Risk-averse mains usually prefer libation bowl; efficiency-focused players willing to risk death pick chaos altar.
How much XP per hour is libation bowl prayer training?
With existing blessed bone shards, rates range from ~670k XP/hr at level 30-32 with blessed wine to ~1.42m/hr at 88-99 with blessed sunfire wine. Using prayer potions and prepared sunfire wine can push rates up to ~1.656m XP/hr in optimal conditions.
What are the requirements for libation bowl prayer?
You need level 30 Prayer, access to the Teomat in Varlamore, blessed bone shards, and either blessed wine or blessed sunfire wine. A chisel is required to break bones into shards, and you'll need 10 coins per bone to unnote at Virilis. Zealot's robes are optional but boost efficiency.
Is chaos altar safe for prayer training?
No. The Chaos Temple is in level 38 multi-combat Wilderness, and PKers frequently camp there. You can reduce risk with suicide or logout strategies, but you will always face the possibility of dying and losing your bones. If you are risk-averse, the libation bowl is safer.
How does the chaos altar bone saving work?
Each bone offered has a 50% chance to not be consumed, and the save can chain multiple times. On average, a bone gives 7x normal burying XP. Zealot's robes add a separate roll, increasing the save chance to 52.5%, for about 7.37x burying XP per bone.
What is the cost per XP difference between libation bowl and chaos altar?
Chaos altar uses bones directly and halves consumption compared to gilded altar, so its GP/XP is roughly half of gilded altar. Libation bowl uses blessed bone shards with fixed XP (5 or 6 per shard) plus wine costs, so its GP/XP varies with shard output per bone and wine prices. Both are cheaper than gilded altar, but chaos altar is often cheaper if you don't die.
Can I use zealot robes at libation bowl and chaos altar?
Yes. At libation bowl, Zealot's robes can save individual blessed bone shards (but not wine charges). At chaos altar, the robes stack with the altar's save chance, giving a 52.5% effective save rate. The full set provides a 5% chance per action, making it valuable for both methods.

.png)
.png)
