OSRS Hueycoatl Guide: Group vs Solo, Loot, and Varlamore's Draconic Boss
24 October 2026 · 9 min readA practical explainer for OSRS Hueycoatl: who it's for, how contribution works in groups and solo, what the unique drops are worth, and how Hueycoatl hide changes ranged armour.
Game screenshots and facts are cited from the Old School RuneScape Wiki (strategy, equipment, drops, and related pages). Writing is original editorial, not a copy of the wiki article.

Contents
- Who Is Hueycoatl For?
- Getting to the Darkfrost and Requirements
- The Fight: Body, Head, Tail, and Vulnerability
- Strategy and Walkthrough
- Equipment and Inventory Setup
- Group vs Solo: Contribution, Instances, and Ironmen
- Loot Table and Unique Value
- Hueycoatl Hide and the Ranged Armour Set
- Combat Achievements and Perfect Kills
- Common Mistakes to Avoid
- Marketplace Knock-on Effects
- Practical Next Steps and Verification
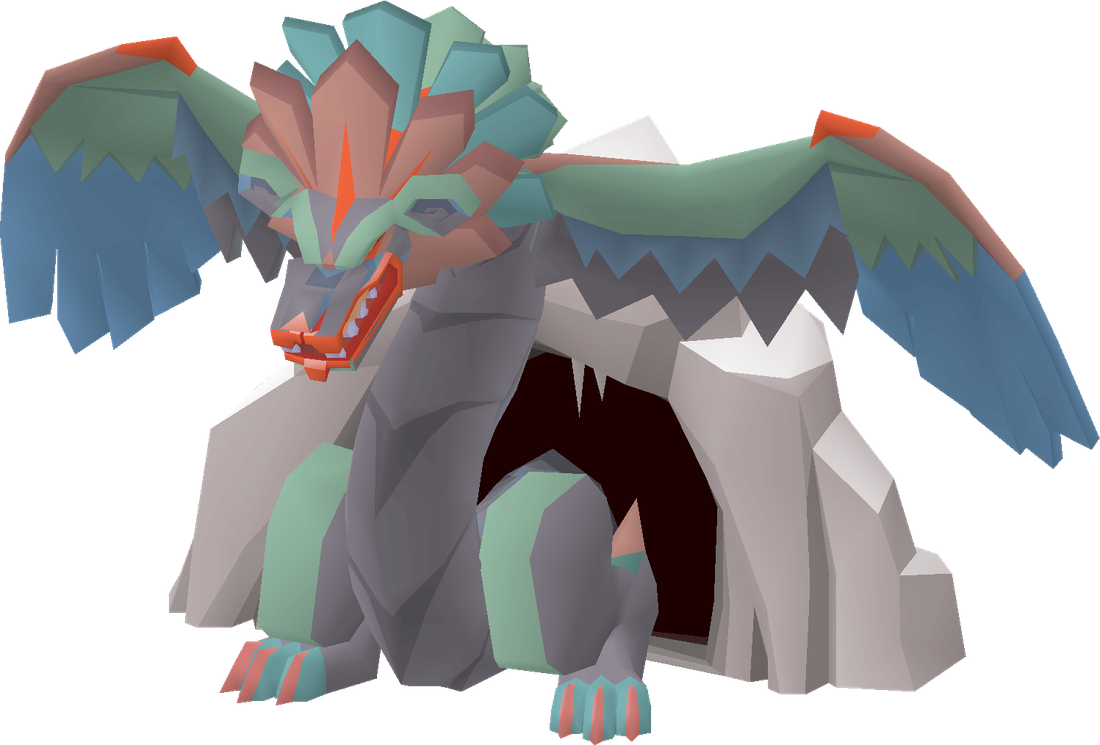
The Hueycoatl is one of the more interesting additions to the Varlamore PvM scene, and it has quickly settled into a role that serves several different audiences at once. For mid-level mains, it's a group boss with a loot table that can spike hard on uniques. For ironmen, it's one of the few Varlamore encounters where group kills still count for drops, provided you meet the contribution threshold. For solo players, it's a test of prayer switches and movement, with a private instance option that keeps the fight consistent. This update explainer walks through the difficulty, the contribution system, the drop rates, and the new gear—so you can decide whether to queue with randoms, pay for a private instance, or bring a small team.

If you're new to OSRS boss releases, our OSRS New Boss Release Checklist is a useful primer on reading update blogs and planning your first kills.

Who Is Hueycoatl For?
The encounter is aimed at players who are comfortable with mid-level bossing but not yet ready for raids or endgame solo content. The wiki's solo money-making guide lists 80+ combat as the baseline, with 90+ recommended for smoother kills, 70+ Prayer if you want Piety, and 76+ for thralls. That places Hueycoatl in a sweet spot: it's more forgiving than something like the Fortis Colosseum, but it still punishes sloppy prayer and positioning. The game itself warns players below 85 combat and 43 Prayer before they enter the arena, although you can still proceed if you accept the risk. Ironmen should pay close attention here—unlike some group bosses, iron accounts are eligible for drops when fighting Hueycoatl in a group. That makes it a legitimate gear progression step rather than a main-only gold printer.
- Children of the Sun to access Varlamore
- 80+ combat recommended; 90+ for solo kills
- 43+ Prayer; 70+ for Piety; 76+ for thralls
- Private instance: 50,000 coins (25,000 with hard Combat Achievements)
- Up to 20 players in a public fight
- Ironmen are eligible for drops in groups
Getting to the Darkfrost and Requirements
The Darkfrost, the boss's lair, sits in the Hailstorm Mountains region of Varlamore, near the dwarven settlement of Cam Torum. To reach Varlamore at all, you need to have completed Children of the Sun, the introductory quest that opens the kingdom from Varrock. From there, the most direct route is to travel to Cam Torum and head to the boss arena. The quetzal transport system is the fastest method—use a quetzal whistle to land at Cam Torum and walk north-east to the lair. If you have access to the Pendant of Ates, you can teleport to Kastori and run west, though this is slightly longer. The private instance option is handled by a meeting flag next to the bank buffalo; activating it costs 50,000 coins per instance, or 25,000 if you've completed the hard Combat Achievements. The boss allows up to 20 players in a public encounter, but a private instance lets you control the group size. If you're below the recommended stats, the game will warn you, but won't block entry.

The Fight: Body, Head, Tail, and Vulnerability
Hueycoatl is not a single target—players initially confront five exposed segments of the boss's body at the base of the arena. The fight then cycles through attacks against the body, the head, and the tail, each with its own positioning demands. The boss uses a lightning attack, a tail slam, and off-prayer projectile attacks; taking avoidable damage from any of these will ruin a perfect kill attempt. There is also a vulnerability window where the boss takes extra damage, which matters for the Pillar Lover combat achievement. Solo players can manage the fight, but the wiki notes that some parts are preferably dealt with in a group, particularly if you're still learning the movement patterns. The key is to always know which segment is active and switch your overheads accordingly.
Strategy and Walkthrough
A reliable kill follows a simple loop. Start by attacking the five body segments while avoiding the lightning pool that appears under random players; move as soon as you see the ground glow. Once the body is destroyed, the boss's head becomes vulnerable—stand in melee range and protect from melee, but be ready to step away when it winds up for a heavy slam. After the head phase, the tail emerges; switch to protect from missile and keep your distance, as the tail has a long swipe that can knock you back. When the boss enters its vulnerable state, all styles deal bonus damage, so save your special attacks and thralls for that window. Repeat this cycle until the boss falls. In a group, split roles: one or two players tank the head, while others focus the tail or deal with body segments if they respawn. Communication matters less than staying out of each other's damage zones.
One nuance for solo players: you can skip the tail phase entirely by dealing enough damage to the head before it transitions, but this requires high DPS and good prayer flicking. For most mid-level accounts, learning the full rotation is safer than forcing a skip.
Equipment and Inventory Setup
Hueycoatl does not demand a single style; melee, ranged, and magic all work, but melee with a dragon hunter lance or dragonbane weapon is the most efficient for the head and body phases. If you have 76+ Prayer, summon thralls (ghostly thralls work well for the vulnerability burst). A typical inventory for a small team kill includes: super combat potions or divine variants, prayer potions, high-healing food (sharks or better), a teleport out, and a rune pouch for thrall runes. If you're soloing, bring a stamina potion for repositioning. The table below outlines a general gear setup for each style; adjust based on your bank.
| Style | Weapon | Armour | Notes |
|---|---|---|---|
| Melee | Dragon hunter lance, abyssal tentacle, or zamorakian hasta | Bandos, obsidian, or barrows | Best DPS on head; bring a defender |
| Ranged | Dragon hunter crossbow, blowpipe, or magic shortbow (i) | Blessed d'hide or Hueycoatl hide when earned | Useful for tail phase and safe distance |
| Magic | Trident of the swamp, sanguinesti staff, or Iban's staff (budget) | Ahrim's, mystic, or void | Required for the earth spell CA; otherwise niche |
Group vs Solo: Contribution, Instances, and Ironmen
Hueycoatl's drop system is contribution-based, and the thresholds depend on group size. For fights with five or fewer players, you need to deal at least 25 damage to the body and at least 75 damage between the head and tail to qualify for normal rewards. For fights with six or more players, you only need to meet one of those two thresholds: either 25 damage to the body or 75 damage across the entire fight. If you're attacking only with neutral damage like recoil, the bar is higher—around 120 total damage. Missing the 25 body damage threshold reduces your rewards by 95%, and the pet chance is reduced by the same amount. You must also stay inside the arena and close enough to the boss; the three eastern-most columns are outside drop range. The MVP of the kill receives big bones in addition to their share.
| Fight size | Body damage needed | Head + tail damage needed | Notes |
|---|---|---|---|
| 5 or fewer players | 25 | 75 | Both thresholds required for normal loot |
| 6+ players | 25 OR 75 total fight damage | — | Only one threshold needed |
| Neutral/recoil only | — | — | Around 120 total damage required |
Loot Table and Unique Value
The boss always drops a share based on your contribution, but only the MVP gets big bones. On top of the main loot, each player has a 1/18 chance to roll the unique table, and that chance is scaled by your contribution. That means a high-damage player in a mass can still see uniques, while low contributors are heavily penalised. The unique table includes three standouts: the dragon hunter wand, which currently holds a high GE value; the tome of earth (empty); and Hueycoatl hide, which comes in batches of three. There's also huasca seeds, a farming unique tied to Varlamore content. The table below shows the base unique rates and approximate values pulled from the wiki's live price data—these numbers move, so always check before you commit.
| Unique item | Quantity | Rate | Approx value |
|---|---|---|---|
| Dragon hunter wand | 1 | 1/105 | 10,586,493 |
| Hueycoatl hide | 3 | 11/315 | 1,201,194 |
| Tome of Earth (empty) | 1 | 1/90 | 479,120 |
Also note that uniques are rolled in addition to the main loot, so a single kill can produce both a regular drop and a unique for a qualifying player.
The regular (non-unique) drop table is less flashy but adds up over time. Based on the wiki's drop rate project, you can expect noted rune weapons and armour (rune mace, rune scimitar, rune platebody) in quantities of 1–26 depending on your damage share. Runes like death, blood, and soul runes are common, and some kills drop dragon arrows or high-level seeds such as ranarr, snapdragon, or torstol. The table below summarises the categories; exact quantities scale with contribution.
| Drop category | Notable examples | Typical quantity range |
|---|---|---|
| Weapons & armour | Rune mace, rune scimitar, rune platebody, dragon dagger | 1–26 (noted) |
| Runes & ammunition | Death runes, blood runes, soul runes, dragon arrows | 10–100 |
| Seeds | Ranarr, snapdragon, torstol, huasca | 1–3 |
| Other | Coins, uncut gems, grimy herbs, dragon bones | Varies |
There is also a tertiary pet drop, rolled independently with the same contribution scaling as uniques. The pet is extremely rare, but because it rolls per player, mass worlds occasionally see multiple pets in a single hour. If you're hunting the pet, you want to be in as many kills as possible while still meeting at least one contribution threshold.
Hueycoatl Hide and the Ranged Armour Set
Hueycoatl hide is the crafting material for a new ranged armour set, and the chaps are the first piece most players will examine. Requiring 70 Ranged, the Hueycoatl hide chaps are a defensive upgrade over blessed dragonhide, with improved Prayer bonuses and Magic defence. The listed combat stats include +17 ranged attack, +31 stab defence, +25 slash, +33 crush, +30 magic, and +31 ranged defence, plus +2 prayer. That makes them a solid bridge for players who have outgrown black d'hide but aren't ready for Armadyl or Masori. Because the hide drops in threes, a single unique roll supplies enough material to make multiple pieces, which has a direct effect on how fast the armour enters the market.

The full set (body, chaps, and coif) is crafted with high-level Crafting, and the pieces are often used in PvM where magic defence matters—Zulrah, Kraken, and some Slayer tasks. The set's prayer bonus also makes it a popular choice for players who camp Protect from Missiles during the tail phase. If you're an ironman, Hueycoatl hide is one of the few ranged armour upgrades you can realistically obtain before God Wars, so plan your kills accordingly.
Combat Achievements and Perfect Kills
Hueycoatl has 11 Combat Achievement tasks worth 41 points, ranging from medium to grandmaster. The medium tasks are simple: kill the boss once, or kill it using only earth spells. Hard tasks require wearing two pieces of Hueycoatl armour, or killing it while vulnerable. Elite and master tasks introduce speed requirements—2:30 kills—and the "Is it a bird?" restriction forces dragonbane weaponry. The grandmaster speed task demands a 2:30 kill with three or fewer players, which is a serious test of coordination. For most players, the real challenge is "Perfect Hueycoatl": five perfect kills without leaving, taking no avoidable damage from lightning, tail slam, or off-prayer projectiles. That achievement alone teaches you every mechanic better than any guide.
Common Mistakes to Avoid
New Hueycoatl killers tend to repeat the same errors. Many miss the contribution threshold by focusing only on the tail or head after the body dies—remember, you need 25 damage on the body in any group size. Others stand too far east and lose drops because those tiles are out of range. A surprisingly common mistake is using the wrong overhead during the transition phases; the boss's projectile colour indicates which prayer to use, and failing that ruins perfect kill attempts. Some players ignore the vulnerability window and waste their best special attacks outside it, cutting their damage per second and making speed tasks much harder. Finally, soloing without a private instance can lead to unexpected interruptions if other players enter the arena—pay the 50k (or 25k with hard CAs) for consistency.
Marketplace Knock-on Effects
Hueycoatl has already made a visible mark on the OSRS economy. The dragon hunter wand, priced around 10.5 million gp at the time of writing, is the big-ticket chase item and will likely hold value as a dragonbane option. The tome of earth sits in the mid-range, while Hueycoatl hide provides steady supply for the new ranged armour, which competes with blessed d'hide in the 70 Ranged bracket. The solo money-making guide estimates 1.7 million gp per hour, which is respectable for a boss that doesn't demand raid-level gear. Because uniques roll individually per player, well-organised small teams can see multiple unique drops per kill, which accelerates supply. If you're short on time or still learning the fight, services that help with Hueycoatl kills or gear funding are an option—Shop with support—just make sure to verify any seller and check live prices before buying.
Practical Next Steps and Verification
Start by checking your combat level and prayer; if you're below 85, you can still enter but expect a slower learning curve. Join an official Varlamore PvM world and try a few public kills to see how the phases flow. Use the contribution table above to ensure you're not losing 95% of your loot. If you want consistent small-team kills, consider a private instance, especially if you have the hard CAs for the 25k discount. Before investing in gear, verify the current price of the dragon hunter wand and Hueycoatl hide on the wiki, as both can swing. For a broader look at how Hueycoatl fits into the Varlamore midgame, read our companion piece on the Varlamore midgame loop. Then decide whether you'll grind the boss yourself, join a mass, or use a marketplace option to speed things up.
Sources
What are the requirements to fight Hueycoatl?
You need access to Varlamore via Children of the Sun. Recommended stats are 80+ combat, 90+ for solo, 43+ Prayer, 70+ for Piety, and 76+ for thralls. A private instance costs 50,000 coins, or 25,000 with hard Combat Achievements. The game warns below 85 combat and 43 Prayer but still allows entry.
Is Hueycoatl soloable?
Yes, Hueycoatl can be fought solo, and the wiki lists a solo money-making method earning around 1.7 million gp per hour. However, some phases are preferably done in a group, so solo kills are slower and more punishing. A private instance is recommended for consistent solo practice.
How do loot mechanics work in a group?
Loot is contribution-based. In a group of 5 or fewer, you need 25 damage to the body and 75 damage between head and tail. In 6+ player groups, you need either 25 body damage or 75 total damage. Missing the body threshold reduces rewards by 95%, and the pet chance is reduced by the same amount.
What is the drop rate for the dragon hunter wand?
The dragon hunter wand has a base unique rate of 1/105 after rolling the 1/18 unique table. The chance is scaled by your contribution, so low-damage players have a much lower effective rate. Its current GE value is around 10.5 million gp, but check the wiki for live prices.
What is Hueycoatl hide used for?
Hueycoatl hide is used to craft the Hueycoatl hide armour set, including chaps and body. The chaps require 70 Ranged and are a defensive upgrade over blessed dragonhide with better Prayer and Magic defence. The boss drops hides in batches of three, speeding up armour creation.
How many players can fight Hueycoatl?
Up to 20 players can fight Hueycoatl in a public encounter. A private instance can be created for a fee to control the group size, which is useful for small teams or solo players. Ironmen are eligible for drops when fighting in a group.
What is the recommended combat level for Hueycoatl?
The wiki recommends 80+ combat as a baseline, with 90+ for solo kills. You should also have 43+ Prayer for overheads, 70+ for Piety, and 76+ for thralls. Players below 85 combat receive a warning but can still enter the arena.