OSRS Varlamore Midgame Loop: Colosseum, Quests, Rewards
22 October 2026 · 11 min readVarlamore has become a dense mid-game loop built around Fortis Colosseum, Twilight's Promise, and quetzal transport. Here is what changed and how players are using it.
Game screenshots and facts are cited from the Old School RuneScape Wiki (strategy, equipment, drops, and related pages). Writing is original editorial, not a copy of the wiki article.

Contents
- Who This Update Is For
- Getting In and Getting Around
- Civitas illa Fortis as the Mid-Game Hub
- Fortis Colosseum Loop: Waves, Modifiers, and Decision Points
- Rewards Breakdown: Quiver, Sunfire Fanatic, and Echo Boots
- Quests That Feed the Loop
- Common Mistakes in the Colosseum
- Time and Cost Tradeoffs
- Marketplace Knock-On Effects
- Practical Next Step
Varlamore has moved from a locked region on Zeah to one of OSRS's most active mid-game loops. After players finish Children of the Sun and start Twilight's Promise, they unlock a capital city, a repeatable wave-based arena, a transport network, and a chain of quests that all feed into each other. The result is not a one-time sightseeing tour—it is a progression path that blends skilling, questing, and high-risk PvM, with tradeable rewards that ripple through the wider economy.

This update explainer walks through the loop players actually use: how to get in, why Civitas illa Fortis matters, how the Fortis Colosseum works as a risk-reward engine, which rewards are worth chasing, what the quest chain gates, and where the common mistakes happen. For anyone trading gold, buying accounts, or selling boosts, understanding this loop is essential because it creates both demand and supply across the market.

Who This Update Is For
Varlamore's post-release content is aimed at accounts that have finished the early game and want an alternative to grinding Kourend favour, mid-level Slayer, or Barrows. The loop is accessible fairly early but scales hard into the high 80s and 90s. Completion of Children of the Sun is the only hard gate for entry, but the full loop assumes you are ready to complete Twilight's Promise and then decide whether to camp wave 1 Colosseum for safe money or push to wave 12 for the big unique drops.
- Complete Children of the Sun to reach Varlamore via Regulus Cento outside Varrock's east gate.
- Complete Twilight's Promise to unlock the quetzal transport system and the Civitas illa Fortis Teleport spell (plus 3,000 Thieving XP).
- For Colosseum money runs, aim for 80+ combat stats and 43+ Prayer. Pushing to wave 12 realistically wants 90+ in several combat skills and a strong ranged or magic setup.
Questers get a dense story thread that runs from the Twilight Emissaries into Perilous Moons and The Heart of Darkness. Skillers get a new Hunter Guild at level 46, a city Thieving activity, and multiple new areas. PvM players get a wave-based arena with a final boss and a rewards chest that can be repeatedly farmed. This is not one niche update—it is a hub that overlaps several playstyles.
Getting In and Getting Around
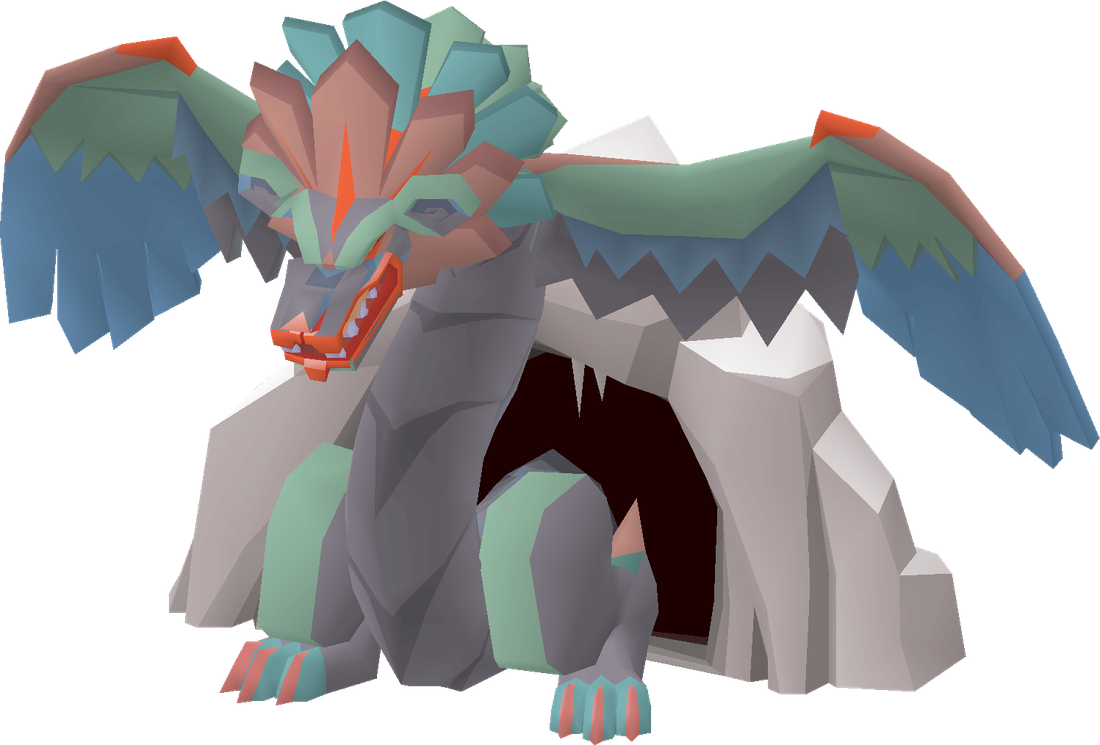
Access starts with Regulus Cento, who stands outside Varrock's east gate after Children of the Sun. He flies you to the capital on a quetzal, a large bird native to Varlamore. Before you finish Twilight's Promise, your transport options are limited to walking and the initial quest travel. After that quest, the quetzal system opens up and you also learn the Civitas illa Fortis Teleport spell, which dramatically reduces travel time.
The Colosseum itself has additional shortcuts. A charged ring of dueling can teleport you directly to the Fortis Colosseum, but this requires having 12,000 Glory stored in the ring. If you have that, you can skip the run from the quetzal landing spot and jump straight into wave selection. That convenience matters when you are doing dozens of wave 1 runs per hour.

Civitas illa Fortis as the Mid-Game Hub
The capital is more than a quest backdrop. It contains a bazaar with shops, the Grand Museum, the Sunrise Palace, a port with charter ships, and the Temple of Ralos. The south-west side of the city has a Thieving activity where you can steal from wealthy citizens, giving mid-level accounts a low-intensity skilling method that pairs with the Colosseum's combat loop.
Twilight's Promise deliberately sends you around Civitas illa Fortis to collect six knights, each in a different part of the city. This introduces the bazaar, the temple crypt, and the palace grounds. After the quest, these same locations become regular stops for banking, prayer restoration, and colosseum teleport access.
- Sunrise Palace: quest hub for Twilight's Promise and The Final Dawn, home of the royal family and the Kualti headquarters.
- Bazaar: central market with shops, and the place where two of the Twilight's Promise knights are found.
- Grand Museum: large museum with artefacts; starts Ethically Acquired Antiquities.
- Temple of Ralos: location of the crypt where Servius and the prince are found in the quest.
- Fortis Cothon: port with charter ship access for alternate travel.

For players who do not want to grind from scratch, having an account with Children of the Sun and Twilight's Promise already completed is valuable because it unlocks the whole loop with minimal downtime. That is a common request on account marketplaces, though players should verify any provider carefully.
Fortis Colosseum Loop: Waves, Modifiers, and Decision Points
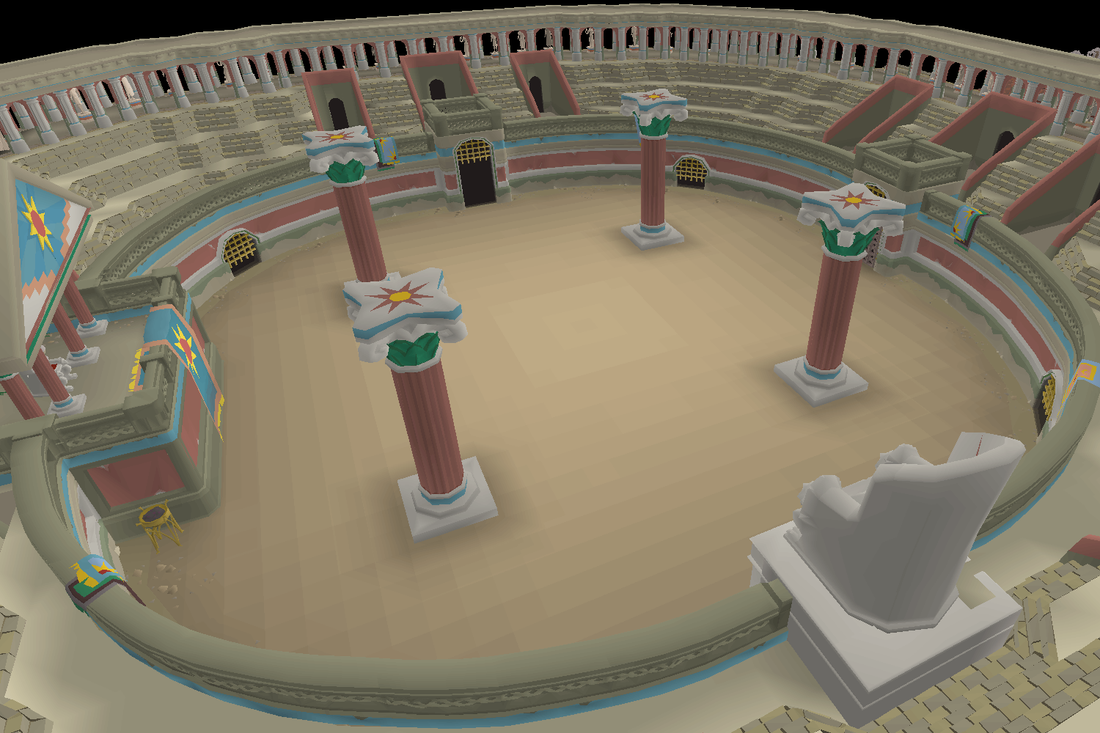
The Colosseum is a wave-based arena where you fight up to twelve waves, ending with Sol Heredit. Enemies spawn in a style similar to the Fight Caves and Inferno, with additional enemies appearing during the wave. Before each wave, the game shows you the current loot and the next wave's loot. You choose to continue and risk it, or end the run and claim what you have earned. If you die, teleport out during a wave, or log out, all accumulated loot is lost. That single rule defines the loop: every extra wave is a gamble on your own consistency.
Modifiers also play a role. The Glory system tracks your personal best performance, and the amount of Glory gained depends on damage taken, time spent, errors made, and the modifiers selected. Modifiers can make waves harder but also award more Glory. This creates a second decision layer: do you take a harder modifier for a better personal best, or play safe for reliable loot?
The table below summarises the wave goals that most players aim for. It is not a strict tier list, but it shows how the risk-reward curve changes as you push deeper.
| Wave goal | Key rewards | Risk and notes |
|---|---|---|
| Wave 1 only | Common loot and sunfire splinters; no unique chance | Low risk, low attention; roughly 1.65m gp/hr with 80s stats |
| Wave 4-6 | First unique chance: Sunfire fanatic armour, echo crystal | Chance of uniques rises with each wave; moderate risk |
| Wave 7+ | Tonalztics of Ralos becomes possible; higher unique chance | High risk; one mistake can wipe the run |
| Wave 12 (Sol Heredit) | Guaranteed Dizana's quiver; chance at Smol Heredit pet | Highest reward, highest intensity; requires strong gear and stats |
For accounts sitting in the mid 80s, the wave 1 farm is attractive because it is repeatable, low-risk, and does not require a rare drop to be profitable. The jump to wave 12 is a different game entirely, but it is where the marquee rewards live.
Rewards Breakdown: Quiver, Sunfire Fanatic, and Echo Boots
Unique rewards begin at wave 4, and the chance of receiving one increases with every wave cleared. The pool includes the Sunfire fanatic armour pieces (helm, cuirass, chausses), the echo crystal, Dizana's quiver, Tonalztics of Ralos, and the Smol Heredit boss pet. Beating the Colosseum by defeating Sol Heredit on wave 12 guarantees a Dizana's quiver.
- Dizana's quiver: guaranteed from wave 12; useful ranged equipment slot item.
- Sunfire fanatic armour: three-piece set from the unique pool.
- Tonalztics of Ralos: wave 7+ unique, presumably valuable for high-level magic setups.
- Echo crystal: used to upgrade guardian boots into echo boots.
- Sunfire splinters: common drop; used to charge the quiver and Tonalztics, and to create sunfire runes, searing pages, and sunfire wine.
- Smol Heredit: boss pet, obtained by beating the Colosseum or gambling a quiver.
Sunfire splinters deserve special attention because they are a common, consumable resource with multiple sinks. Every run produces them, but the quiver and Tonalztics consume them for charges, and runecrafters or herblore players convert them into useful items. That consistent demand keeps splinters moving through the market, unlike many boss uniques that only move when someone buys a single piece of gear.
Quests That Feed the Loop
Twilight's Promise is the second quest in the Twilight Emissaries series and is deliberately designed to introduce players to Varlamore's features. After a short sequence with the Tullus twins and the temple crypt, you track down six knights across the city. It is not a long quest, but it gates the quetzal transport system and the city teleport, which are essential for efficient Colosseum farming.
Varlamore also has a long list of quests that build on the region. Some, like Perilous Moons and The Heart of Darkness, are locked behind Twilight's Promise. Others, like Children of the Sun, are entry points. For mid-game accounts, Perilous Moons is the natural next step after you have finished the city quest nonsense, because it offers another set of tradeable gear and a repeatable boss loop. We covered that in more detail in our OSRS Moons of Peril guide.
- Children of the Sun: entry quest, started by talking to Noah or Alina in Varrock Square.
- Twilight's Promise: second quest, started by talking to Ennius or Furia Tullus south of the Sunrise Palace.
- Perilous Moons: mid-game boss content, started by talking to Zuma at the Cam Torum entrance.
- The Heart of Darkness: sequel quest, started by speaking to Prince Itzla Arkan at the Teomat.
- Other quests like The Ribbiting Tale, Scrambled!, and Shadows of Custodia round out the region for different skill levels.
If you are buying an account specifically for Varlamore content, having Children of the Sun and Twilight's Promise completed is the minimum baseline. Accounts that also have Perilous Moons unlocked are in even higher demand because they skip the entire introductory chain.
Common Mistakes in the Colosseum
The most obvious mistake is pushing one wave too far. Because all accumulated loot vanishes on death or teleport, overconfidence is the fastest way to waste an hour. Players often think they can handle wave 7 or 8 with mid-level gear, then die to a modifier or a bad spawn pattern.
- Farming wave 1 but expecting unique drops: uniques do not appear until wave 4, so wave 1 is purely common loot and splinters. Adjust your expectations.
- Ignoring modifiers: some modifiers drastically increase incoming damage or add extra enemies. If you do not understand a modifier, do not select it just for Glory.
- Not banking between runs: after ending a run, the rewards chest appears in the centre. Claim it before starting another run, or you risk confusion and lost time.
- Teleporting out mid-wave to save loot: teleporting out during a wave is treated the same as death—all loot is lost. You must end the run before the wave starts to keep rewards.
This is not a tutorial-heavy minigame. The game tells you the rules in the interface, but the consequences are only obvious after you lose a full run once. Reading the wave 1 and wave 12 money making guides on the wiki before committing is a smart move.
Time and Cost Tradeoffs
The Colosseum's hourly profits make the tradeoffs clear. According to the wiki's money making guides, completing just wave 1 repeatedly earns about 1,650,000 gp per hour with combat stats in the 80s. Completing the full Colosseum through wave 12 jumps to roughly 12,830,169 gp per hour, but it assumes 90+ in multiple combat skills, strong gear, and high-level prayers.
For most mid-game players, the wave 1 farm is the reality. It requires less attention, fewer supplies, and no rare drop dependency. The jump to wave 12 is a long-term goal that may require dozens of hours of gear progression, not just a better weapon. If you are buying gold to skip that gear grind, remember that RWT is against Jagex rules and carries account security risks. Legitimate marketplaces that sell boosts or account services operate in a grey area, but no provider is endorsed by Jagex. Always verify any seller and never share your login details with unverified parties.
Marketplace Knock-On Effects
The loop creates several market dynamics. On the supply side, wave 1 farms generate a steady flow of sunfire splinters and common loot, which pushes down the price of splinter-derived items. On the demand side, the quest chain and the Colosseum's difficulty create demand for quest completions, account setups with Varlamore access, and Colosseum carries for wave 12 completions or Combat Achievements.
For buyers, a Varlamore-ready account is often cheaper than buying the equivalent gear and quest completions separately, but account trading is risky and violates Jagex's terms of service. If you are looking for a legitimate boost, a wave 12 carry or a Perilous Moons service can save time, but always use a trusted provider with verified reviews. A marketplace that specialises in OSRS gold and accounts can be a convenient option, but it is not a Jagex-endorsed shortcut. We cover the honest tradeoffs in our marketplace guides, and our Shop with support page lists current service options.
Practical Next Step
If you have not touched Varlamore yet, start Children of the Sun, then immediately begin Twilight's Promise. After you finish the quest, unlock the quetzal network, buy or earn a ring of dueling with 12,000 Glory, and run five wave 1 Colosseum attempts to get a feel for the reward interface. From there, decide whether you want to camp wave 1 for steady gp, push for wave 4 uniques, or work towards a full wave 12 clear.
For players with less time, buying a Varlamore-ready account or a Colosseum boost can shortcut the early grind, but it carries account security and rule-breaking risks. Use the wiki pages linked below to verify all requirements and drop rates before spending real money on any service. The Varlamore loop is deep enough that a few hours of research will pay for itself in avoided mistakes.
Sources
How do I unlock Varlamore in OSRS?
Complete the free-to-play quest Children of the Sun, then talk to Regulus Cento outside Varrock's east gate. He will take you to Civitas illa Fortis on a quetzal. Afterward, start Twilight's Promise to unlock the quetzal transport system and the Civitas illa Fortis Teleport spell.
What are the requirements for Fortis Colosseum?
You need access to Varlamore through Children of the Sun. For wave 1 money runs, around level 80 in combat stats and 43+ Prayer are recommended; for wave 12 completions, 90+ in several combat skills and high defensive stats make the final boss manageable. No quest completion inside the Colosseum is required beyond access.
Is Fortis Colosseum good money for mid-game accounts?
Yes. Clearing just wave 1 repeatedly can earn roughly 1.65 million gp per hour with mid-80s stats. Pushing to wave 12 for a guaranteed Dizana's quiver raises hourly profit to around 12.8 million, but it demands high combat stats, strong gear, and tolerance for losing all accumulated loot on death.
What rewards does Fortis Colosseum offer?
Unique rewards start from wave 4 and include Sunfire fanatic armour, the echo crystal for echo boots, and Dizana's quiver from beating all 12 waves. Tonalztics of Ralos only appears from wave 7 onwards. Sunfire splinters are common and can be converted into runes, pages, or wine.
What is Dizana's quiver used for?
Dizana's quiver is a ranged equipment slot item that can be charged with sunfire splinters. It is guaranteed when you defeat Sol Heredit at wave 12. Players can also gamble a duplicate quiver with Minimus for a chance at the Smol Heredit pet or exchange it for 4,000 sunfire splinters.
Does Twilight's Promise unlock anything important?
Yes. Twilight's Promise is the second quest in the Twilight Emissaries series. Completing it grants access to the quetzal transport system, the Civitas illa Fortis Teleport spell, and 3,000 Thieving experience. It is also a requirement for Perilous Moons and The Heart of Darkness.
What other mid-game activities are in Varlamore?
Besides the Colosseum, Varlamore offers the Hunter Guild at level 46 Hunter, a Thieving activity in the capital, the Perilous Moons boss encounter network, and multiple quests like The Heart of Darkness and The Ribbiting Tale. The Avium Savannah provides hunter creatures and a fairy ring with code A J P.