
OSRS Dizana's Quiver Guide: Colosseum Wave Plan & Death Costs
25 October 2026 · 13 min readA high-end PvM guide to earning Dizana's quiver from the Fortis Colosseum, covering wave strategy, Sol Heredit mechanics, death costs, and why the quiver adds premium account value.
Game screenshots and facts are cited from the Old School RuneScape Wiki (strategy, equipment, drops, and related pages). Writing is original editorial, not a copy of the wiki article.

Contents
- Who This Is For and What You Need
- The Wave Plan: How to Structure a Quiver Run
- Sol Heredit: The Final Gate
- Death Costs and What You Actually Lose
- Why the Quiver Is a Listing Premium
- How to Charge and Maintain Your Quiver
- Modifiers and High-Yield Risk
- Learning the Colosseum vs Buying a Service
- Common Mistakes That Cost You Runs
- Your Next Step
The Fortis Colosseum is not just another wave-based arena; it is where the best ranged cape slot item in Old School RuneScape is earned. Dizana’s quiver requires 75 Ranged to equip, gives +18 ranged attack in a slot that previously had far weaker options, and unlocks a second ammunition pouch. For high-end PvM accounts, this single unlock changes how you gear for everything from slayer bosses to the Inferno itself.

This guide covers the wave plan that turns a chaotic Colosseum run into a repeatable quiver route, the real cost of dying, and why accounts with a quiver command a premium on the market. It is aimed at players who already have solid combat stats and are weighing the time investment of learning Sol Heredit against the price of a service.

Who This Is For and What You Need
- Completion of Children of the Sun for access to Varlamore
- High combat stats – the wiki’s money-making guide for wave 12 assumes 95+ Attack, Strength, Defence, Ranged, and Magic, with 90 Prayer recommended
- 77+ Prayer for Rigour and Augury (recommended)
- 80+ in relevant combat skills for lower waves; higher is strongly recommended for Sol Heredit
- 75 Ranged to equip the quiver once earned
If you are still working on base 80s, the Colosseum will teach you painful lessons. This content punishes mistakes with lost loot and a full restart, so treat it as a ceiling challenge rather than mid-game content. You do not need a twisted bow or max gear, but you do need to understand wave mechanics and be able to react under pressure.
Players who have already completed the Inferno will find the Colosseum different: the final boss, Sol Heredit, is less about prayer flicking and more about positioning and pattern recognition. That makes it learnable for players who struggle with triple Jad waves but are consistent with movement. If you are still progressing through Varlamore midgame content, see our Varlamore midgame loop guide before attempting this.
The Wave Plan: How to Structure a Quiver Run
The Colosseum runs from wave 1 to wave 12, with Sol Heredit on the final wave. Each wave shows you the current and upcoming loot; you can bank your rewards at any time by ending the run, but if you die or teleport out mid-wave, everything accumulated is lost. The only item guaranteed by completing wave 12 is Dizana’s quiver, so any plan for the quiver must include saving enough supplies and mental focus for the final fight.
Below is a practical comparison of the three common ways players approach the Colosseum. The exact wave times vary with gear and modifiers, so treat them as relative, not absolute.
| Approach | Waves Cleared | Attention Required | Risk | Typical Reward |
|---|---|---|---|---|
| Wave 1 farming | 1 | Low | Very low; only the first wave’s loot is at stake | About 1.1m gp/hr from common drops; no quiver |
| Full clear for quiver | 12 plus Sol Heredit | Very high | Lose all accumulated loot on death | Dizana’s quiver guaranteed; unique rewards from wave 4+ |
| Glory hunting / speedruns | 12, with hard modifiers | Extreme | High; modifiers add mechanic load | Quiver plus higher Glory/combat achievement progress |
For a first quiver, the safest plan is to take no difficulty-increasing modifiers unless you are confident; the base waves are already challenging enough. Use the first few runs to learn enemy spawn patterns and pillar placement. Once you can consistently reach wave 8-9 without dying, start pushing for Sol.
Unique rewards can be obtained from wave 4 onwards, with higher chances each wave. They include:
- Sunfire fanatic helm, cuirass, and chausses
- Dizana’s quiver (guaranteed at wave 12)
- Tonalztics of Ralos (wave 7+)
- Echo crystal, which upgrades guardian boots to echo boots
- Smol Heredit pet
- Sunfire splinters, used to charge the quiver and Tonalztics or create sunfire runes, searing pages, and sunfire wine
Sol Heredit: The Final Gate
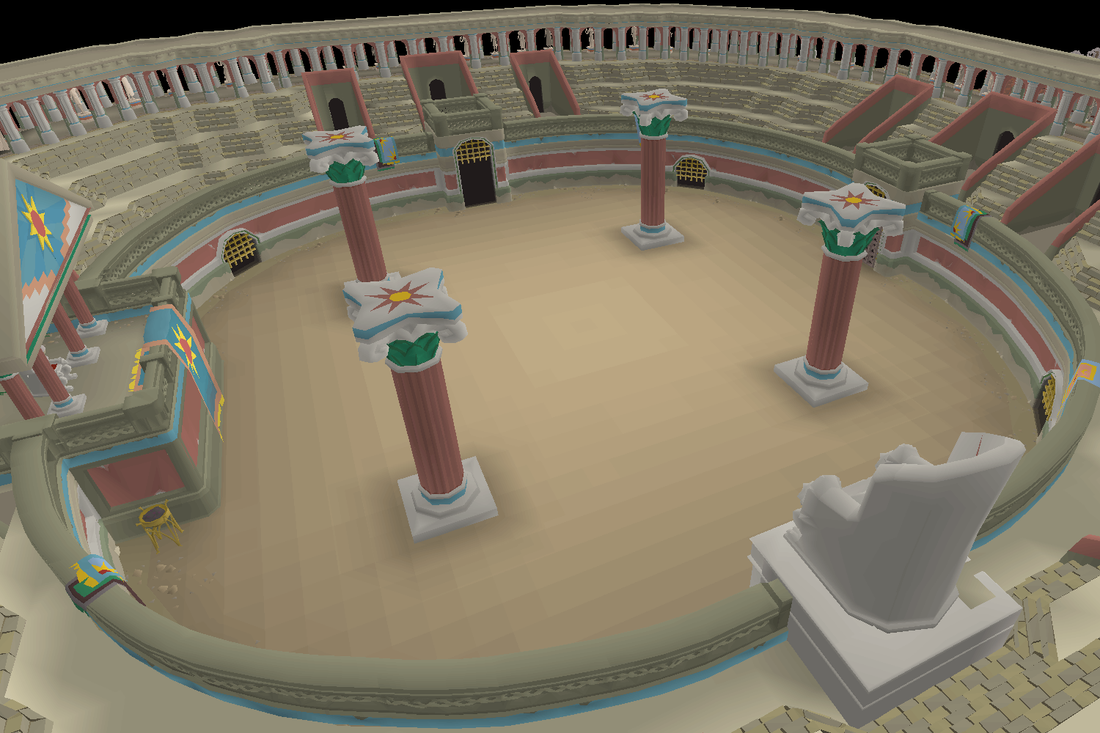
Sol Heredit is the second strongest monster in Old School RuneScape at combat level 1,563, and his fight is a strict movement check. The arena shrinks to a space between four pillars, and his attacks deal typeless damage that prayer does not reduce — you must step out of the way or eat the hit.
He alternates between two core attack families: Spear and Shield. Each has two patterns. If he repeats the same family twice in a row, the second pattern changes; switching families resets the cycle. The key to the fight is recognising the visual cue and moving to the correct tile before the attack lands. At 90%, 75%, 50%, 25%, and 10% health, he transitions phases, spawning beams of light that turn into molten sand and a crystal that circles the arena firing additional hazards.
The basic dodges are:
- Spear 1: Move back from his centre or edge tiles.
- Spear 2: Move to any off-centre tile.
- Shield 1: Move one tile back from the hazard.
- Shield 2: Move two tiles back from the larger hazard.

Unlike the Inferno’s Zuk, Sol Heredit does not require prayer switching against multiple attack styles. Instead, the challenge is memory under pressure: remembering which Spear or Shield pattern came last, tracking the rotating crystal, and not panicking when the arena fills with hazards. Many learners find it takes 20-40 attempts after first reaching him, though that number drops sharply once you stop eating avoidable damage early.
Death Costs and What You Actually Lose
The good news is that your equipped gear and inventory follow normal death mechanics — there is no unique item tax or pet risk here, unlike some other high-end content. The real cost is opportunity: an hour of wave clearing, supplies used, and the potential uniques that were in the chest. For a learner, this can be demoralising, but it also means the only way to lose the quiver you already own is if you never enter the arena again.
Once you have the quiver, dying elsewhere does not destroy it. It remains in your inventory or equipment slot unless you are in the Wilderness with it, where standard PvP rules apply. Charging it with sunfire splinters does not make it riskier on death; the charges stay on the item.
Why the Quiver Is a Listing Premium
Dizana’s quiver is not just a cosmetic; it is the best ranged attack bonus in the cape slot. The uncharged quiver already outclasses Ava’s assembler for raw offence, and charging it with sunfire splinters adds a passive called Dizana’s Sunfire: +1 ranged strength and +10 ranged accuracy on arrows or bolts, with a 1/3 chance to consume a charge per shot.
The second ammunition slot is the quiet game-changer. You can carry two types of ammunition — for example, dragon arrows in the quiver and ruby dragon bolts in the ammo slot — and swap weapons without losing your blessing. This is enormous for hybrid setups at bosses like Zulrah, Muspah, or even raids. No other cape slot item offers this utility.
Because the quiver requires a full Colosseum clear, accounts that have it are immediately more valuable on the market. A seller can list “Dizana’s quiver unlocked” as a premium feature, and buyers understand that this account has already passed a high-level PvM gate. For players buying an account rather than boosting, the quiver is one of the strongest signals of end-game readiness.

Minimus will also exchange a duplicate quiver for either 4,000 sunfire splinters or a 1/200 chance at Smol Heredit. That gives the item an indirect floor value of roughly 1,004,000 coins based on splinter price, but its utility value is far higher for any account that uses ranged combat.
How to Charge and Maintain Your Quiver
Sunfire splinters are the currency of the quiver. You can add up to 20,000 charges to the quiver, and each charge gives the Dizana’s Sunfire passive to arrows and bolts fired. The quiver consumes a charge randomly on 1/3 of shots, so a stack of splinters lasts a long time. You can configure charges while the quiver is in your bank by right-clicking and selecting Configure-Charges, as long as you have the required materials.

Not every ranged weapon benefits from the charge. Darts from a toxic blowpipe, chinchompas, and the bow of Faerdhinen cannot receive the bonus because their ammunition cannot be stored in the quiver. The venator bow will not consume quiver charges but still gains the accuracy and strength bonus if using appropriate arrows. Check the wiki for the full list of interactions before deciding whether to charge your quiver for a specific activity.
Modifiers and High-Yield Risk
From wave 6 onward, you are offered modifiers that change enemy behaviour or add hazards. Some are simple, like Red Flag, which increases enemy aggression; others, like Doom II or Bees II, add stacking pressure. Modifiers increase Glory gain and can improve unique chances indirectly by making runs more efficient, but they also multiply the chance of a costly death.
Combat Achievements add another layer for players who want prestige. Tasks like Perfect Footwork (no damage from Sol’s Spear, Shield, Grapple or Triple Attack) or Reinforcements (Bees II, Quartet, and Solarflare II active) are grandmaster-tier and push the content into true ceiling territory. They are not required for the quiver, but they are the reason some players keep coming back after their first clear.
Learning the Colosseum vs Buying a Service
There is no shame in learning the Colosseum yourself; many players find the wave format more forgiving than the Inferno because you can bank rewards between waves. But the time investment is real. A first quiver can take anywhere from a few days to a few weeks depending on your PvM background, and every death on wave 10+ feels expensive.
For players who enjoy the process, the Colosseum is a fantastic teacher. It forces you to improve your movement, resource management, and composure — skills that transfer to every other piece of end-game content. But if your main account is a main that you want to use for bossing rather than a personal challenge, the cost of a boost may be less than the value of the time you would spend learning. See our Inferno guide for a comparison of similar high-level challenges.
Common Mistakes That Cost You Runs
- Overvaluing early uniques: A Tonalztics of Ralos on wave 7 is tempting, but if you are not safe, bank it. The run ends only when you decide, not when the game offers you loot.
- Forgetting Sol’s pattern memory: After phase transitions, he remembers his previous attack family. If you lose track, you will eat avoidable typeless damage.
- Ignoring pillars: The arena pillars are not just scenery; they block certain hazards and create safe zones. Learn which attacks they can block and which they cannot.
- Taking hard modifiers early: Red Flag on wave 6 might seem fine until it stacks with later mechanics. Keep the run simple.
- Not having enough saradomin brews/restores: Typeless damage adds up. Bring more healing than you think you need; leaving early to bank is better than dying deep.
Your Next Step
If you are ready to earn the quiver, start with a gear setup that prioritises ranged accuracy and prayer bonus. Run waves 1-5 a few times to learn enemy spawns, then begin pushing toward Sol. Keep a journal of which wave kills you and why. If after a week you are still dying before wave 12, consider whether your time is better spent elsewhere — or check what a Colosseum boost would cost.
Get a service quote for a Fortis Colosseum clear or account upgrade. The quiver is one of the few unlocks that immediately increases both your account’s power and its resale value.
Sources
What requirements do I need for the Fortis Colosseum?
You need Children of the Sun completed and high combat stats. The wiki money-making guide assumes 95+ in melee, ranged, and magic for wave 12, with 90 prayer recommended. 75 Ranged is required to equip the quiver. 77 prayer for Rigour/Augury is strongly advised.
How much does dying in the Colosseum cost?
Dying causes you to lose all accumulated loot from that run, not your equipped items. There is no gravestone fee for the chest, but losing a wave 11 chest can erase an hour of progress and potential uniques.
Is Dizana's quiver worth the effort?
Yes, for any account that uses ranged. It is best-in-slot ranged attack at +18, adds a second ammo slot, and can be charged for +1 ranged strength and +10 accuracy. It also raises account resale value.
Can I lose Dizana's quiver on death?
In normal PvM deaths, the quiver stays with your gravestone like any other item. In the Wilderness, standard PvP rules apply. The quiver is not lost in the Colosseum itself; only the run's chest rewards are lost.
How do I charge Dizana's quiver?
Use sunfire splinters on the quiver to add up to 20,000 charges. The passive Dizana's Sunfire gives +1 ranged strength and +10 accuracy to arrows/bolts, with a 1/3 chance to consume a charge per shot. Configure charges in bank.
Is the Colosseum harder than the Inferno?
The Colosseum and Inferno test different skills. Sol Heredit relies on movement and pattern memorisation rather than prayer switching. Many players find Sol more learnable, but wave-to-wave mob pressure can be intense. The Inferno remains longer and more punishing overall.
How long does it take to learn the Colosseum and get the quiver?
That depends on PvM background. Players with Inferno experience often need 10-20 hours of attempts; others may take 30-50 hours. Using a service can reduce this to zero if you value your time more than the learning process.


